The Basics of IICS

Informatica Intelligent Cloud Services is Informatica's cloud-based offering for ETL and data integration. It's an iPaaS solution. According to Informatica's website, it "unifies existing Informatica cloud service offerings and expands into a full suite of cloud data management services over time." There are four primary services that you will be greeted with when using IICS: Data Integration, Administration, Monitoring, and Operational Insights:

Fortunately, Informatica has a 30-day demo version so I decided to dive in and check it out! Although most of the program is web-based, it's still necessary to install a secure agent locally if you want to get any of the connections, mappings, or other functions working properly. In this case, I decided to install it in Windows using the "agent64_install_ng_ext.6504.exe" executable. A word of caution: this only seems to work properly when installing to the default location, so hopefully you weren't set on installing it to anything other than the C:\ drive. Once installed, it should prompt you for your username and password, or install token.
You can verify that all the services are up and running by checking the Cloud Secure Agent:

Once that's been done, it's best to start with setting up a runtime environment. You can do this by going to the "Administrator" panel and clicking on "New Runtime Environment." If the secure agent installed properly, then you should be able to give the environment a name and click OK.

This is going to be a fairly simple ETL pipeline, mainly for the purposes of getting to know the interface. I'm going to use the Toronto real estate CSV that was web-scraped from an earlier post. I will run it through a few transformations/filters, then push it to a PostgreSQL database table running in Docker. The next step is to setup your connections in order to form the basis for your mappings. For the CSV, there's a ready-made "flat file" connector that can be used:

There's a basic selection of connectors that come with IICS, like so:

But there are also additional add-on connectors for technologies like Databricks, Azure, Snowflake, etc. that can be added. This was what had to be done for PostgreSQL after adding the credentials and database information. The next step is to set up the mapping, which will allow us to specify the source and target, as well as any filters, transformations, aggregations (etc.) in between. So we will begin by going to the Data Integration panel and selecting the "Mappings" option:
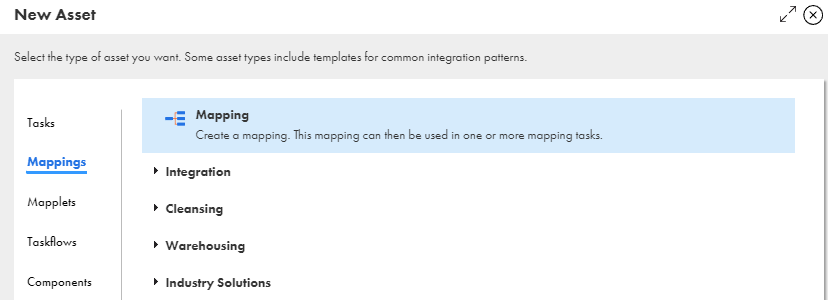
Once done, we will then be putting the icons ("shapes" in Informatica parlance) for the source and target on the canvas:
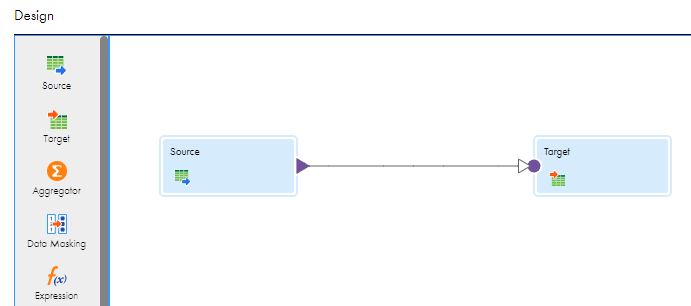
Once you select the Source, there will be an editor window where the CSV file can be selected (this can only be done with a valid connector in place):

There is also a place to select which fields you wish to carry over to the target. Speaking of the target, we will specify our PostgreSQL database using the option to INSERT the data:

Now that the source and target are in place, what kind of transformations should be run on the data? For one thing, I want the "price" column to exclude any special characters and for the data type to be an integer. As such, we can set up a regular expression in the "Expression" shape:

In this case, the regex will be: REG_REPLACE(price,'[^a-z0-9A-Z]','')
This will remove any special characters from the field, including dollar signs, and is set up in the "Expression" option in the editor window. Finally, I will set up a filter to remove any results from the "postal_code" column that has a value of "Not listed". To do this, we will use the "Filter" shape in the working area:
For this function, the parameters are a bit more simple: click on the plus sign under "Filter" and select the "postal_code" field, the "!=" (not equals) operator, and "Not listed" (without quotes) for the value.
Once the transformations are done, this is what it looks like:
The only thing left to do is verify the target and make sure the columns have been mapped. In this case, there was a 1:1 ratio between the source column name and the target column name, so I was able to use the "Automatic" field name option and the column names mapped over without issue. After that, it was just a matter of hitting the green "run" button and the pipeline was complete!


Comments
Post a Comment